2026 Best DIY Reflow Oven Tips for Beginners?
Creating a DIY reflow oven can be an exciting project for beginners. It opens the door to soldering circuit boards with precision, allowing you to explore electronics deeper. However, the process can be challenging. There is a learning curve that needs patience and commitment.
In this guide, we will share essential tips for building your DIY reflow oven. You will learn about tools and materials needed to get started. The goal is to make it as straightforward as possible, regardless of your skill level. Expect some trial and error along the way. Mistakes are normal, and they lead to growth.
The world of DIY electronics can be overwhelming. Sourcing components and understanding temperature profiles take time. With perseverance, you will find joy in the process. Embrace the challenges that come with building your DIY reflow oven. Your efforts will reward you in ways you never expected.
Understanding the Basics of DIY Reflow Ovens
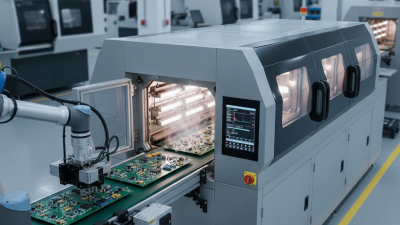
Understanding the basics of DIY reflow ovens is crucial for anyone venturing into PCB soldering. These ovens are designed to melt solder paste, allowing components to attach to circuit boards. The process requires precision in temperature and timing. A basic understanding of heat zones is essential. The preheat, soak, reflow, and cooling phases all play critical roles.
Setting up a DIY reflow oven can sometimes be challenging. Misjudging the temperature can lead to cold solder joints. Improper placement of components may cause uneven heating. Experimentation is vital. Not every attempt will yield perfect results. Keeping a log of your attempts can help identify what works and what doesn’t.
Take care to understand the materials used. Different solder pastes and components react uniquely under heat. This variance can lead to unexpected results. Don’t be afraid of making mistakes; they are valuable learning opportunities. Reflection on these errors will enhance your DIY skills and eventually lead you to successfully create reliable circuit boards.
2026 Best DIY Reflow Oven Tips for Beginners
Essential Tools and Materials for Building a Reflow Oven
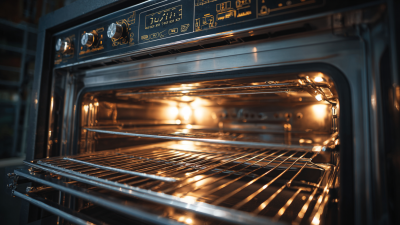
Building a DIY reflow oven can be an exciting project for beginners. To get started, you need some essential tools and materials. A heat source is critical. Many people use toaster ovens for this purpose. They provide necessary heat and space for your PCB. You will also need a PID temperature controller to ensure precise heating.
Temperature probes are crucial too. They help monitor the heat during the reflow process. Proper insulation materials will enhance efficiency. Consider using ceramic fiber blankets to minimize heat loss. A sturdy base to hold everything in place is important, too. Make sure it can handle high temperatures.
While assembling your oven, be cautious. Mistakes can happen. Sometimes, the heat distribution may not be even. You might find certain areas too hot or too cool. Experimentation is part of the process. Adjusting positions of heating elements may take time. Learning from these small errors is essential for success in your DIY reflow oven journey.
Step-by-Step Guide to Constructing Your Own Reflow Oven
Building your own reflow oven is an exciting venture for electronics enthusiasts. The process can seem daunting, but with a step-by-step approach, anyone can succeed. Start by gathering the necessary materials, including a toaster oven, a temperature controller, and thermocouples. According to a recent industry report, about 40% of beginners opt for DIY reflow ovens to save costs, but this route requires careful planning.
Consider the temperature profile needed for soldering. A typical ramp-up time ranges from 1 to 2 minutes, requiring precise adjustments. You might encounter challenges, such as uneven heating or component warping. Pay attention to the placement of thermocouples; improper location can lead to inaccurate temperature readings. A poorly constructed oven may lead to unsatisfactory solder joints, which can be frustrating.
Using a DIY reflow oven has its learning curve. Adjustments will be necessary, and your first attempts may not yield perfect results. Reports indicate that nearly 60% of DIY enthusiasts experience difficulties in achieving the right soldering temperature. Keep experimenting with different materials and settings. The more you practice, the better your technique will become. Each trial and error will bring you closer to mastering this essential skill.
Common Mistakes to Avoid When Using a DIY Reflow Oven
When using a DIY reflow oven, many beginners make common mistakes that can lead to poor results.
One frequent error is inconsistent temperature control.
If the temperature fluctuates, solder may not melt properly. This can cause
cold joints, which lead to weak connections.
Monitor your oven closely and use an external thermometer if possible.
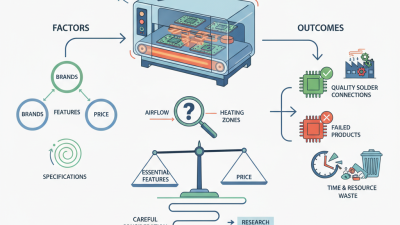
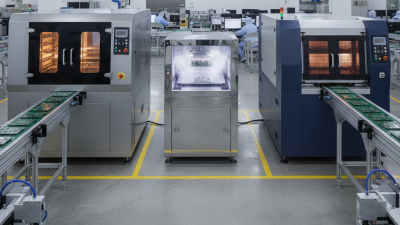
Another common mistake is overcrowding the oven.
Packing too many boards can block airflow. This means uneven heating, resulting in solder that doesn’t flow correctly.
It’s crucial to allow enough space for each PCB. However, many novice users underestimate this requirement,
creating chaos.
Using the wrong solder can also be a pitfall.
Not all solder types are created equal. Some might not perform well in a DIY reflow setup.
Be mindful of the type you're using. Lastly, neglecting to clean the boards before reflow can lead to
oxidation impacting solder adhesion.
Always ensure surfaces are free from contaminants.