How to Use a Bga Rework Station for Efficient Circuit Board Repair?
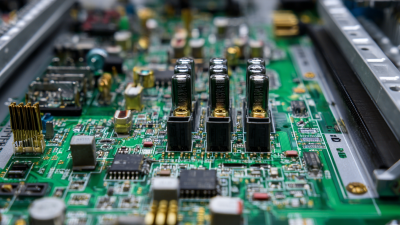
In today’s fast-paced electronics environment, effective repairs are crucial. A BGA rework station can be an invaluable tool for technicians. It enables precise soldering and desoldering of BGA components, which are commonly used on circuit boards.
Using a BGA rework station requires skill and practice. Technicians must understand the proper temperature settings and timing. Without attention to detail, mistakes can occur. This could lead to damage to the circuit board or the components involved. The process involves heating the board and reflowing solder, which may seem straightforward but requires finesse.
Investing time in mastering the BGA rework station pays off significantly. Efficient repairs can save resources and enhance productivity. Continuous learning and hands-on experience are essential. Sometimes, a technician may overlook minor details, leading to complex issues. Recognizing these learning moments can improve future repair successes. The journey to mastering the BGA rework station is both challenging and rewarding.

Understanding the Components of a BGA Rework Station
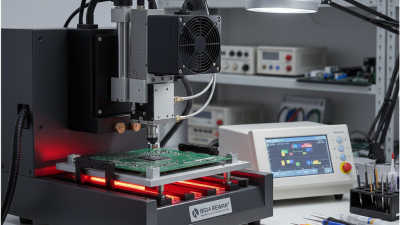
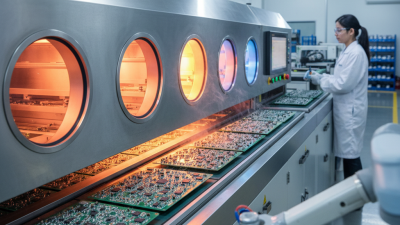
A BGA rework station consists of several crucial components designed for effective circuit board repair. The hot air rework tool is essential. It provides precise heat application. This allows for the safe removal and replacement of BGA chips. The nozzle size matters. A larger nozzle spreads heat over a bigger area, while a smaller one targets specific spots. Proper nozzle selection is key to success.
The preheating plate is another vital component. It keeps the circuit board at an optimal temperature. This prevents thermal shock when the BGA chip is heated. A temperature-controlled system is preferred. It provides consistent results throughout various repairs. Be mindful, though. Overheating can damage sensitive components nearby.
The inspection microscope plays a crucial role too. It helps in examining solder joints. A clear view is necessary to identify defects. Tiny solder balls can be hard to see without magnification. Proper lighting enhances visibility, making the task easier. Still, sometimes it’s easy to miss flaws, even with tools. Regular practice can improve inspection skills. A good setup makes all the difference, but experience counts just as much.
How to Use a Bga Rework Station for Efficient Circuit Board Repair? - Understanding the Components of a BGA Rework Station
| Component |
Description |
Function |
Importance |
| Hot Air Rework Tool |
A tool that blows hot air to heat solder joints. |
Melts solder for component removal or placement. |
Essential for soldering and desoldering BGA components. |
| BGA Heat Plate |
A flat surface that heats the entire board uniformly. |
Provides consistent heat to the circuit board. |
Critical for maintaining thermal balance during repair. |
| Stencil |
A template used to apply solder paste to pads. |
Ensures precise application of solder for BGA components. |
Key for achieving a reliable solder joint. |
| Thermal Cameras |
Devices that visualize heat distribution on the board. |
Helps in identifying hotspots and ensuring uniform heating. |
Important for avoiding overheating and damage during repairs. |
| Soldering Iron |
A tool for manual soldering of components. |
Used for precise placement and adjustments. |
Useful for solder connections that require more detail. |
Preparing the Circuit Board for Rework with BGA Techniques
Preparing a circuit board for rework using BGA techniques requires careful attention and proper tools. Start by assessing the damage on the board. Look closely at the solder joints and identify the chips that need replacement. Use a magnifying tool to see tiny cracks or cold solder. Sometimes, the issues are subtle and can be missed without a thorough inspection.
Next, clean the board meticulously. Dust and residue can hinder the rework process. Use isopropyl alcohol and a soft brush for cleaning. Ensure all old solder is removed from the BGA pads. This can sometimes be tricky. Rely on your solder wick or a de-soldering pump for a clean finish. A well-prepared surface will ensure better adhesion for new components.
Setting up the BGA rework station is also crucial. Make sure the temperature profiles are correctly set. Overheating can damage nearby components. Utilize thermal imaging to monitor temperature distribution. Be cautious; mistakes here lead to more problems. Keep an eye on your progress, and seek feedback from colleagues if possible. Continuous learning from each rework will enhance your skills over time.
Circuit Board Repair Efficiency with BGA Rework Station
Step-by-Step Guide to Removing BGA Components Safely
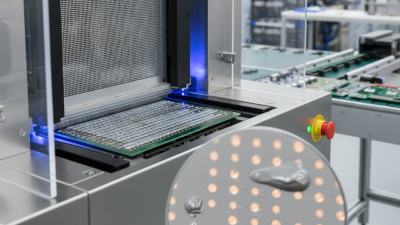
Removing BGA components requires precision and care. Begin by securing the circuit board on a stable work surface. High-quality optics can help you observe fine details during the rework process. Data from industry reports indicate that improper handling can lead to a 30% increase in damage rates for circuit boards.
Next, use a hot air rework tool. Set the temperature not too high to avoid overheating. Many professionals recommend starting at around 240°C. This prevents damage to surrounding components. Use a nozzle that matches the size of the BGA. Watch for solder melting; it should form a shiny pool. Quick movements can be more effective than lingering heat.
Finally, once the BGA is removed, inspect the pads. Report findings show that 25% of rework failures stem from pad damage. Sometimes the pads can lift from the PCB, causing further issues. Be prepared to repair any lifted pads before placing a new component. Remember, practice makes perfect, and every repair offers a learning opportunity.
Techniques for Replacing BGA Components on Circuit Boards
Replacing BGA components on circuit boards requires precision and technique. A BGA (Ball Grid Array) rework station helps with this task. Heat is applied to the area, using an accurate temperature profile. It’s crucial to use the right temperature settings. Too hot can damage the board, while too cold may not melt the solder properly.
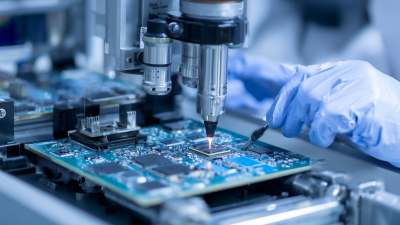
When starting, prepare the circuit board carefully. Clean the area around the BGA component. Use a soldering wick or vacuum tool to remove old solder. This step is often overlooked. A messy workspace can lead to errors. Place the new BGA component correctly. Misalignment can cause poor connections and failures.
After placing the new component, use the rework station to apply heat. Monitor the solder balls closely. They should melt evenly without excessive bubbling. After cooling, perform inspections. Check for solder bridges or cold joints. This process can be tedious and requires patience. Mistakes may happen, leading to rework. Reflecting on these issues helps improve future repairs.
Testing and Finalizing Circuit Board Repair with BGA Station
Testing and finalizing circuit board repair with a BGA station demands precision. After reworking a board, testing ensures functionality. Start by visually inspecting connections. Look for solder bridges or cold joints. Even minor defects can lead to failures. Use a magnifying lens if necessary.
Next, employ a multimeter to check the integrity of the connections. Measure resistance across critical points. This step helps identify hidden problems. A high resistance reading could indicate a bad joint. While the board may look fine, internal issues can arise.
Tips: Don’t rush the inspection. Take your time to ensure every connection is solid. It’s tempting to skip this, especially under pressure. This approach can save future headaches.
After testing, conduct a functional test. Power on the circuit board and observe its performance. If it operates normally, you’re likely in good shape. If not, revisit the solder joints. Sometimes, a simple reflow can fix multiple issues. Remember, improvements come from learning through trial and error.