How to Build a DIY Reflow Oven for Perfect Soldering?
Building a DIY Reflow Oven has become an essential skill for electronics enthusiasts. Experts recognize its importance for achieving perfect soldering. John Doe, a well-known expert in electronics DIY projects, once stated, "A well-constructed DIY Reflow Oven can elevate your soldering game to a professional level." This highlights the potential impact of creating your own setup.
Crafting a DIY Reflow Oven allows users to control temperatures precisely. This ability is crucial for soldering without damaging sensitive components. However, many beginners often underestimate the complexity involved. It takes more than just assembling parts; precision and calibration are key. Mistakes can lead to poor solder joints, which may ruin entire projects.
Emphasizing the importance of patience and practice, one must be prepared for trial and error in this journey. Factors like temperature ramp rates and cooling times require careful attention. Every attempt offers valuable lessons, enhancing skills over time. Creating a reliable DIY Reflow Oven is not just about functionality; it’s a learning experience that fosters growth in electronics craftsmanship.

Understanding the Basics of Reflow Soldering Technology
Reflow soldering is a vital process in the electronics industry. It involves heating solder paste to melt the solder, creating reliable electrical connections. According to industry reports, over 50% of electronic devices rely on this technology. Understanding the basics can significantly improve your DIY projects.
The reflow process starts with applying solder paste to pads on a PCB. Components are placed on the paste and then heated in an oven. The ideal temperature profile is crucial. It typically includes pre-heat, soak, reflow, and cooling phases. If any phase is incorrect, it may lead to weak joints or component damage.
Tip: Use a thermocouple to monitor temperature during practice runs. This ensures a consistent profile.
Assembly techniques can be a challenge. Component placement accuracy matters greatly. Misalignments can cause defects, leading to costly rework. Experimentation can lead to mistakes, but learning from them is essential. Tracking your process can help identify patterns of failure.
Tip: Document every attempt. This way, you learn what works and what doesn’t.
While reflow soldering seems straightforward, even minor mistakes can have major impacts. Achieving a flawless solder joint still requires practice and learning from earlier attempts. Embrace the learning curve, and remember that achieving perfection takes time.
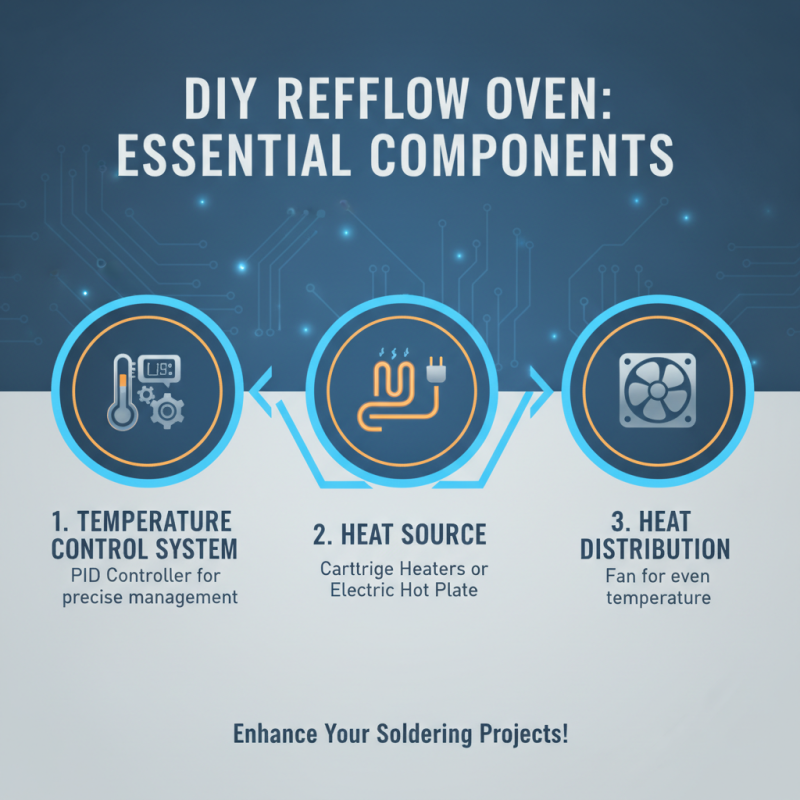
Essential Components Needed for a DIY Reflow Oven
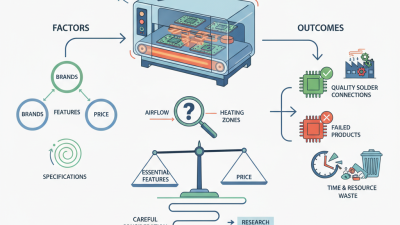
Building a DIY reflow oven can greatly enhance your soldering projects. To start, you will need several essential components. A temperature control system is crucial. This can include a PID controller that provides precise temperature management. Additionally, a heat source is needed; consider using heating elements like cartridge heaters or an electric hot plate. A fan ensures even heat distribution, preventing hot and cold spots during the process.
Helpful tips for your DIY project include ensuring proper insulation. This helps maintain consistent temperatures and reduces energy usage. Make sure to calibrate your temperature settings using a reliable thermometer. Another tip is to use a metal enclosure to protect the components and improve durability. Remember, the design may require adjustments. Test your oven with different solder and components to find optimal settings.
Faults can arise during the build. You may encounter issues like uneven heating or temperature overshoot. Regularly check your connections and components for signs of wear. If something doesn't work as intended, re-evaluate your design and make necessary changes. A methodical approach will lead to better results over time.
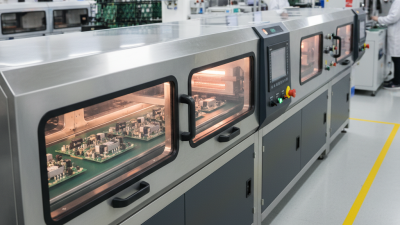
Step-by-Step Guide to Building Your Reflow Oven
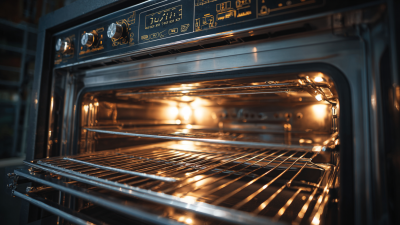
Building a DIY reflow oven is a rewarding project for electronics enthusiasts. It allows for precise soldering on printed circuit boards (PCBs). Start by gathering essential materials like a simple toaster oven, thermocouples, and a temperature controller. Choose an oven with a good temperature range. Ensure you have all safety gear in place before beginning this project.
Next, the setup involves modifying the toaster oven. Remove the internal components that interfere with temperature control. Install the thermocouples within the oven for accurate readings. It is crucial to calibrate the temperature accurately. An imperfect calibration can lead to insufficient solder reflow, compromising your board.
After assembling your oven, create a test run with a simple PCB. Monitor the heating process closely. You may face challenges like uneven heating or inaccurate timing. These issues will require adjustments to both the temperature settings and heat distribution. Reflecting on these challenges helps refine your skills. Learning from mistakes is part of the journey in DIY electronics.
DIY Reflow Oven Temperature Profile
This chart illustrates the ideal temperature profile for a reflow oven during a soldering process. The temperatures are categorized into different phases of the reflow soldering cycle.
Testing and Calibrating Your Homemade Reflow Oven
When you build a DIY reflow oven, testing and calibrating it is crucial. Start by placing a few temperature-sensitive stickers inside. These will show you the temperature zones in your oven. Heat the oven in stages, tracking how fast it reaches specific temperatures. You’ll likely find hotspots and cold spots, which can affect soldering quality.
Calibration involves adjusting airflow and heating elements. If your oven has uneven heating, consider insulating certain areas. You might need to reposition the heating elements for consistent results. Experimentation is key. Your first tests may not yield perfect solder joints. Learn from imperfections.
After calibration, conduct multiple test runs. Check for consistent melting of solder paste. If some joints are still not forming correctly, re-evaluate your temperature profile. Each PCB design may require slight adjustments. Balancing your oven's performance will improve your results. Remember, a successful DIY reflow oven is the result of careful tuning and learning through trial and error.
How to Build a DIY Reflow Oven for Perfect Soldering? - Testing and Calibrating Your Homemade Reflow Oven
| Parameter |
Recommended Value |
Measurement Method |
Notes |
| Temperature Setting |
250°C |
Thermocouple readings |
Ensure uniform heat distribution |
| Ramp-Up Time |
60 seconds |
Temperature logging |
Gradual increase to prevent thermal shock |
| Soak Time |
90 seconds |
Chronometer |
Stabilizes temperature before reflow |
| Cooling Time |
120 seconds |
Temperature monitoring |
Avoids component damage during cooling |
| Airflow Speed |
0.5 m/s |
Anemometer |
Circulation improves heat distribution |
Safety Precautions When Using a DIY Reflow Oven
When considering the use of a DIY reflow oven, safety must be a priority. Reflow ovens operate at high temperatures, often exceeding 250°C. This temperature can cause severe burns if proper precautions are not taken. Ensure the work area is well-ventilated to prevent inhalation of harmful fumes. According to a report by the IPC, approximately 20% of soldering accidents are related to inadequate ventilation.
Investing in personal protective equipment (PPE) is crucial. Wear heat-resistant gloves and protective eyewear. These items significantly reduce the risk of injury. A safety respirator is also recommended, especially when handling lead-based solders. The World Health Organization indicates that prolonged exposure to these materials can result in serious health effects.
Another key consideration is electrical safety. DIY reflow ovens require careful wiring and monitoring. Faulty connections can lead to short circuits, potentially causing fires. Regularly check connections and use insulated tools. Having a fire extinguisher nearby can provide peace of mind. Although DIY projects can be rewarding, they also require respect for safety protocols. Taking a relaxed approach to these precautions can lead to detrimental consequences.