inquiry
Leave Your Message

How to Choose a PCB Stencil Printer in 2026?

Choosing a PCB Stencil Printer in 2026 requires more than comparing machine prices. The right system must match board complexity, production volume, solder paste behavior, and operator skill. A printer that performs well on a simple two-layer board may struggle with 0.4-millimeter pitch components. That difference appears quickly on the production floor.

Happy Holden, a respected PCB manufacturing engineer, is often credited with saying, “The stencil is the heart of the printing process.” His observation remains relevant. The printer controls alignment, pressure, squeegee speed, separation, and paste transfer. These details influence aperture filling, deposit consistency, bridging, and rework rates. Look closely at real operating conditions. Ask for printed samples using your own board files, paste, and stencil thickness. A polished demonstration can hide practical weaknesses.

This guide examines the features that matter when selecting a PCB Stencil Printer for modern assembly lines. It considers manual, semi-automatic, and fully automatic platforms. It also reviews vision alignment, programmable printing parameters, cleaning systems, changeover time, traceability, and technical support. Total ownership cost matters too. Consumables, maintenance, training, and downtime can outweigh the initial purchase price.

Some choices remain uncertain. A faster printer is not automatically better. Higher automation may create unnecessary complexity for a smaller factory. Even experienced teams can overlook cleaning access or software usability. Therefore, evaluate measurable results, not impressive specifications alone. The best decision usually comes from controlled trials, operator feedback, and honest analysis of production risks.

How to Choose a PCB Stencil Printer in 2026?

What a PCB Stencil Printer Does and Why It Matters

How to Choose a PCB Stencil Printer in 2026?

What a PCB Stencil Printer Does and Why It Matters

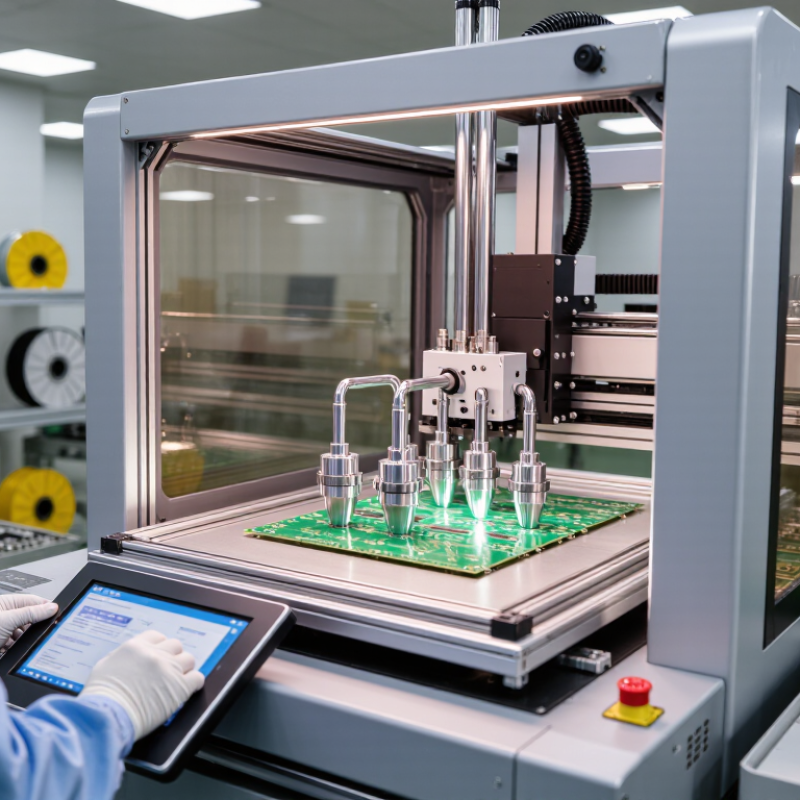
A PCB stencil printer deposits solder paste through stencil openings onto bare circuit boards. Its job sounds simple. It is not. The machine controls board support, stencil alignment, squeegee pressure, print speed, and separation. These variables shape paste volume and placement before components are mounted. Unstable pressure can create thin deposits on fine-pitch pads and excess paste on larger pads. Small errors multiply.

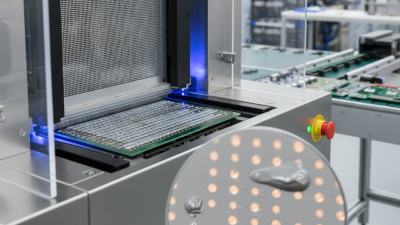
In production, this matters because the printed pattern sets the quality baseline for soldering. Poor paste release may cause bridges, opens, or uneven joints after reflow. In 2026, useful equipment should also record printing parameters for process tracking. Look for accurate vision alignment, rigid tooling, adjustable support pins, controlled separation, and simple recipe management. Verify these functions with real boards, not only demonstrations. Ask for repeatability data and inspect paste deposits with 3D measurement when possible.

I have seen teams blame reflow when the real problem began at the stencil. A clean first print can still degrade after several cycles because paste collects beneath the stencil. Plan inspection and cleaning access. Choose equipment that fits your board sizes, changeover time, operator skills, and maintenance habits. The fastest printer may fail if setup is complicated. No printer removes every defect. Human judgment still matters. That is easy to underestimate.

Which PCB Stencil Printing Requirements Should You Define?

When choosing a PCB stencil printer in 2026, define production requirements before comparing equipment. Start with board dimensions, stencil size, paste type, and expected daily volume. The printer must support your smallest apertures without damaging paste release. Specify alignment accuracy in microns, not vague terms such as “high precision.” Also define acceptable print speed, repeatability, and changeover time.

Consider the entire work area. Will operators load heavy panels manually? Is automatic stencil cleaning required after every batch? Decide how the printer will handle warped boards, mixed assemblies, and different solder paste conditions. A stable print process should include adjustable squeegee pressure, controlled speed, and clear inspection data. Ask for documented test results using your own boards. Supplier demonstrations can look perfect, but real production includes dust, tired operators, and imperfect panels.

Tips: Record at least three months of print defects before finalizing requirements. Include cleaning materials, spare parts, training, and maintenance in the ownership cost. Do not specify maximum speed alone. Useful output matters more. Your first specification may be wrong. Review it with operators, process engineers, and quality staff. A small compromise in automation might be acceptable, while poor alignment control can create repeated rework. Leave room for future board sizes, but avoid paying for capacity your factory will never use.

How to Compare Manual, Semi-Automatic, and Automatic Printers

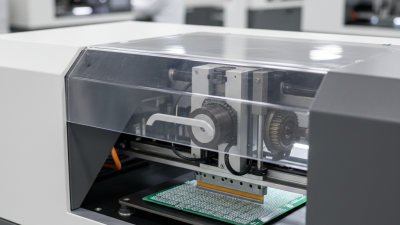
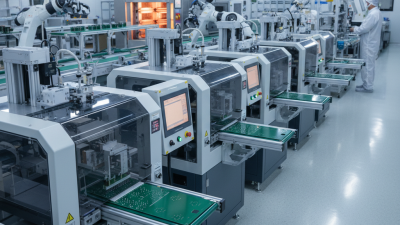
Choosing a PCB stencil printer in 2026 starts with production reality, not brochure speed. Manual printers suit prototypes, repair work, and short runs. They cost less, but operator pressure and alignment can vary between boards. Semi-automatic models add controlled squeegee movement and repeatable registration. They often fit growing workshops with mixed products. Automatic printers provide vision alignment, programmable pressure, and faster changeovers. Their value appears when volume, traceability, and first-pass yield matter.

A 2024 report from Research and Markets estimated the global SMT equipment market at several billion dollars, with automation supporting higher production consistency. IPC’s 2024 electronics industry survey also identified labor availability as a continuing manufacturing challenge. These findings support a practical choice: buy automation where it removes a measurable bottleneck. A fully automatic machine may be wasteful for twenty boards weekly. It may be necessary for thousands of boards daily. My own comparison would also include cleaning time, stencil storage, feeder access, and training. Purchase decisions often miss these details. That is a costly oversight.

Tips: Record alignment errors, paste defects, setup minutes, and operator adjustments for four weeks. Compare those numbers against each printer’s cycle time and service requirements. Ask for a live demonstration using your thinnest stencil and smallest aperture. Check whether the machine handles warped panels without heroic intervention. IPC-7525 guidance can help verify stencil design and print-process controls. A cheaper printer can still win, but only when its limitations match your real workload.

Which Technical Features Affect Printing Quality and Efficiency?

How to Choose a PCB Stencil Printer in 2026?

Which Technical Features Affect Printing Quality and Efficiency?

A reliable stencil printer begins with accurate board alignment. Look for vision-assisted fiducial recognition and stable X, Y, and theta adjustment. Mechanical repeatability matters when pads are small and densely arranged. A practical target is alignment accuracy within 20 micrometres, though actual results depend on board design. Test the printer with your smallest apertures, not only an easy sample board.

Squeegee control directly affects paste transfer. Independent pressure adjustment, controlled printing speed, and adjustable blade angle help maintain a consistent deposit. Closed-loop pressure monitoring is valuable because a displayed setting may not equal real force. I prefer checking printed paste with solder paste inspection equipment after setup. A clean-looking print can still hide uneven volume. Stencil separation speed also matters, especially with fine-pitch components. Poor snap-off control may leave smears or incomplete deposits.

Efficiency depends on more than cycle time. Automatic under-stencil cleaning, programmable cleaning intervals, and quick tooling changes reduce production interruptions. Temperature and humidity monitoring can support process stability, but operators still need disciplined paste handling. I have seen excellent machines produce weak results after rushed setup. That is an uncomfortable reminder. Ask for repeatability data, maintenance access, and operator training records before purchase. A printer with many features is not automatically the best choice. Real performance should come from measured transfer efficiency, stable registration, and consistent results across several production runs.

How to Evaluate Costs, Maintenance, Safety, and Supplier Support

How to Choose a PCB Stencil Printer in 2026?

A reliable evaluation starts with total cost, not the purchase price. Include installation, training, tooling, electricity, consumables, and planned downtime. Ask for a clear maintenance schedule. Check how often blades, seals, filters, and alignment parts need replacement. I have found that easy access saves more money than a low initial quote. A removable paste tray and visible adjustment points can reduce cleaning time. Still, cost estimates are never perfect. Production volume often changes after installation.

Safety should be practical and measurable. Look for guarded moving parts, emergency stops, safe access doors, and clear operating instructions. Confirm whether cleaning procedures limit skin contact with solder paste and solvents. Ask about noise levels and operator posture during long shifts. A short trial with real boards can expose awkward controls or poor visibility. Supplier support matters just as much. Request response times, remote diagnostics, spare-parts availability, and technician coverage in your region. Written commitments are more useful than friendly promises.

Tips: Compare three-year ownership costs, not only quotations. Test setup changes with new operators. Ask suppliers to explain common failures. Record cleaning time during a live demonstration. Review training materials before signing. Leave room for uncertainty; a machine that fits today’s line may need different tooling next year.

How to Choose a PCB Stencil Printer in 2026? - How to Evaluate Costs, Maintenance, Safety, and Supplier Support

Evaluation Dimension What to Check Entry-Level Manual Printer Precision Manual Printer Semi-Automatic Printer Automatic Printer Recommended Evaluation Method
Typical purchase price Machine price before installation, shipping, taxes, tooling, and optional feeders US$1,000–3,000 US$3,000–8,000 US$8,000–25,000 US$25,000–100,000+ Compare the complete installed cost rather than the advertised machine price
Best production profile Board volume, product variety, changeover frequency, and operator skill level Prototyping, repair, and low-volume production Frequent prototypes and small-batch production Repeated small-to-medium production runs High-volume production with stable product families Match automation level to annual board volume and changeover requirements
Typical throughput Boards processed per hour, excluding breaks and material replenishment Approximately 10–25 boards/hour Approximately 15–35 boards/hour Approximately 30–60 boards/hour Approximately 60–150+ boards/hour Validate throughput using the actual board size, stencil, paste, and print sequence
Placement and print repeatability Mechanical alignment quality, fixture rigidity, and consistency between operators Usually operator-dependent Good with rigid tooling and calibrated guides Generally consistent after setup Request repeatability results from a trial using the customer’s own PCB and stencil
Supported PCB size Maximum board dimensions, thickness range, and support for irregular boards Commonly up to 300 × 400 mm Commonly up to 400 × 500 mm Commonly up to 500 × 500 mm Often 500 × 500 mm or larger Check both the maximum size and the usable area after clamping and support tooling
Stencil compatibility Framed and frameless stencil support, frame dimensions, and quick-change capability Often frameless or small framed stencils Framed and frameless options are commonly available Usually supports standard framed stencils Usually supports framed stencils with automatic alignment features Confirm compatibility with existing stencil suppliers and standard frame sizes
Changeover time Time required to replace the stencil, fixture, PCB program, and support tooling Approximately 5–15 minutes Approximately 5–12 minutes Approximately 3–8 minutes Approximately 2–6 minutes after programs are prepared Measure a complete changeover with a trained operator, not only stencil replacement
Operator requirements Training time, setup complexity, inspection duties, and dependence on operator technique Higher dependence on operator technique Moderate training requirement Moderate training with recipe control Lower manual intervention but higher programming responsibility Include training, work instructions, and backup operator coverage in the evaluation
Compressed air requirement Air pressure, air quality, consumption, and the need for a dedicated compressor Usually none or limited Usually none or limited Often clean, dry air at approximately 5–7 bar Often clean, dry air at approximately 5–7 bar Confirm pressure, flow rate, filtration, and whether the requirement is continuous or intermittent
Electrical requirement Voltage, phase, rated power, plug type, and compatibility with the production area Commonly single-phase, 100–240 V Commonly single-phase, 100–240 V Commonly single-phase, 100–240 V Single-phase or three-phase depending on configuration Obtain the final electrical specification before purchase and site preparation
Routine maintenance Cleaning, lubrication, calibration checks, and replacement of wear parts Cleaning after use and periodic guide inspection Cleaning, lubrication, and alignment checks Cleaning, lubrication, sensor checks, and scheduled calibration Preventive maintenance, software checks, calibration, and pneumatic servicing Ask for a maintenance schedule with daily, monthly, and annual tasks
Expected maintenance time Planned labor required for routine care, excluding repairs caused by misuse Approximately 15–30 minutes per week Approximately 30–60 minutes per week Approximately 1–2 hours per week Approximately 2–4 hours per week Calculate labor cost using the actual operator or technician hourly rate
Common consumables and wear parts Squeegees, blades, seals, filters, lubricants, sensors, and fixture components Squeegee blades, clamps, and fixture parts Squeegee blades, clamps, and alignment components Squeegees, seals, filters, sensors, and pneumatic parts All semi-automatic items plus drives, sensors, and control-system parts Request a two-year spare-parts list, prices, lead times, and recommended stock levels
Safety provisions Guards, emergency stops, pinch-point protection, interlocks, and electrical safety Basic guarding and emergency-stop provisions should be verified Guarding and emergency-stop provisions should be verified Typically includes interlocks and guarded moving mechanisms Typically includes interlocks, guarded zones, alarms, and controlled access Request a risk assessment, user manual, conformity documentation, and safety test records
Operator exposure control Protection from moving parts, solder paste contact, cleaning chemicals, and spills Requires strong work instructions and personal protective equipment Requires strong work instructions and personal protective equipment Improved physical separation from moving mechanisms Best physical separation when loading and unloading are controlled Evaluate the complete work cell, including paste handling, cleaning, ventilation, and waste disposal
Software and recipe management Program storage, access control, backups, traceability, and compatibility with factory systems Manual settings or limited digital records Manual settings with optional digital documentation Recipe storage and basic production data are commonly available Advanced recipes, data logging, and integration options are commonly available Check whether programs can be backed up, transferred, locked, and restored without supplier assistance
Quality-control support Print pressure control, speed control, alignment checks, inspection records, and process monitoring Mostly visual and operator-based control Improved mechanical control with operator verification More repeatable settings and documented recipes Advanced process monitoring may be available depending on configuration Define acceptance criteria for print alignment, paste coverage, and repeatability before testing
Supplier installation support Installation, commissioning, site requirements, and initial process setup Remote guidance is common Remote guidance or scheduled on-site support On-site commissioning is commonly recommended On-site installation and process qualification are strongly recommended Confirm what is included, travel charges, response time, and commissioning deliverables
Training and documentation Operator training, maintenance training, troubleshooting guides, and language availability Basic operating manual and short training session Operating and maintenance documentation Operator, setup, and maintenance training Structured training for operators, technicians, and programmers Require training records, illustrated procedures, and documentation in the required working language
Technical response target Time to acknowledge a support request and provide a troubleshooting action plan Often 1–3 business days Often 1–3 business days Commonly same business day to 2 business days Contract-dependent; premium support may be available Put response and escalation times into the service agreement rather than relying on verbal promises
Five-year total cost of ownership Purchase, installation, training, utilities, labor, maintenance, spare parts, and downtime Approximately 1.2–1.8 times the purchase price Approximately 1.3–1.9 times the purchase price Approximately 1.5–2.2 times the purchase price Approximately 1.7–2.5 times the purchase price Use your actual utilization and labor rates; include the financial impact of downtime and rework
Best overall fit Selection priority Lowest initial cost and maximum flexibility Balanced cost, control, and flexibility Balanced productivity and process consistency Maximum throughput, traceability, and repeatability Choose the lowest automation level that meets quality, capacity, safety, and support requirements
Indicative 2026 evaluation ranges for general purchasing analysis. Actual values vary with PCB size, stencil format, options, region, labor rates, installation conditions, and service contracts. Obtain a written quotation and conduct an application trial before making a final decision.