Building a Diy Pick And Place Machine can feel exciting, practical, and slightly overwhelming. A small desktop frame, stepper motors, feeders, and a vacuum nozzle can become a useful assembly tool. However, successful placement depends on careful calibration, stable mechanics, and realistic expectations. These five beginner tips focus on the details that often determine whether a machine works smoothly or repeatedly misses components.
Begin with a rigid frame and check every moving axis for unwanted play. Even a tiny wobble can shift a 0603 resistor several millimeters. Use manufacturer datasheets when selecting nozzles, motors, drivers, and vacuum pumps. Their specifications provide safer limits than guesswork. Test one feeder before building ten. Mark component pockets clearly, and keep parts protected from dust and moisture. Vision systems also need patience. A camera may recognize a large integrated circuit but struggle with reflective components under uneven lighting. Add a simple calibration board, measure nozzle offset, and record each adjustment. Small logs help.
Some choices will fail.
That is normal. My early instinct would be to automate everything, but manual loading may be more reliable during testing. Run slow dry cycles before placing real components. Check emergency stops, cable routing, and static protection before powering the machine. Compare placement results across several boards, not just one successful trial. A dependable Diy Pick And Place Machine is built through measured improvements, honest testing, and careful documentation. It may never match industrial equipment, yet it can become accurate enough for prototypes when each limitation is understood.
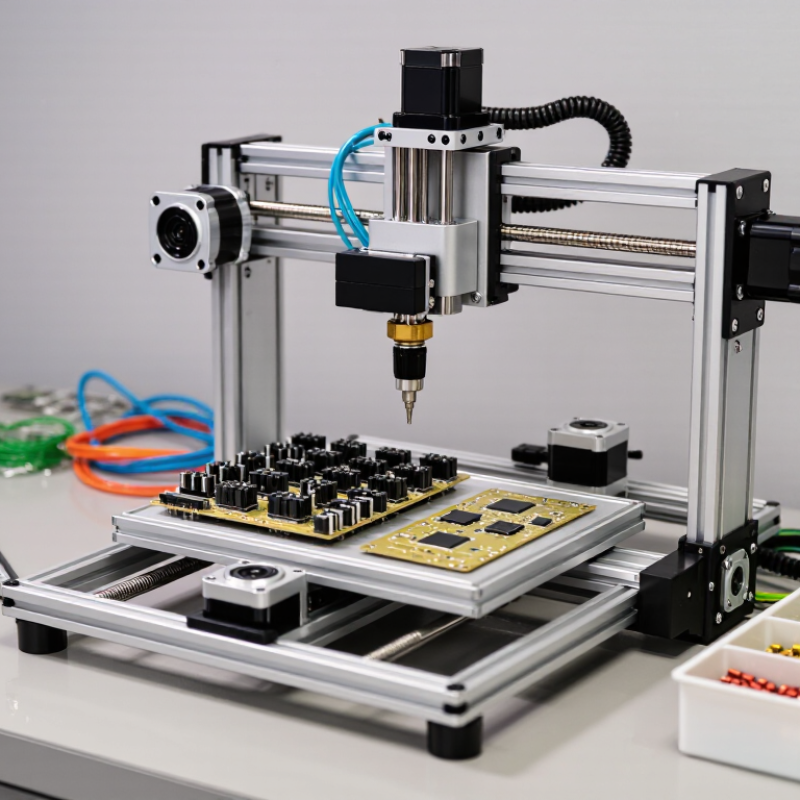
A beginner-friendly pick and place machine should be simple before it becomes clever. Choose a design with a rigid frame, visible moving parts, and clear assembly drawings. You should understand where each motor, belt, and sensor belongs. A compact XY gantry is often easier to build than a complex multi-axis arm. Keep the working area small. Smaller travel distances reduce vibration and calibration errors.
Check five practical details before cutting materials. Select stepper motors with common drivers and accessible wiring diagrams. Use a modular feeder that accepts different component sizes. Leave room for manual loading when automatic feeding fails. Add adjustable suction height, because tiny parts rarely sit perfectly flat. Include limit switches and an emergency stop from the beginning. These features protect both the machine and the operator.
A camera is useful, but it should not be your first dependency. Start with fixed part positions and test placement accuracy using inexpensive components. Measure repeatability across twenty movements, not just one successful attempt. My early designs looked accurate until the belt loosened after several hours. That mistake taught me to inspect tension, nozzle alignment, and frame squareness regularly. Choose software with readable settings and calibration instructions. A design that is slightly slower, but easier to repair, usually serves a beginner better. Document every adjustment with photos and measured values. Your notes may reveal problems that the machine itself hides.
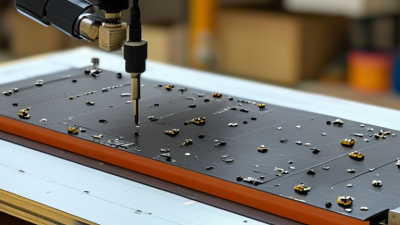
5 DIY Pick And Place Machine Tips for Beginners
Gather Essential Parts, Tools, and Safety Equipment
Building a DIY pick and place machine starts with a realistic parts list. You need a rigid frame, motion rails, motors, controllers, wiring, feeders, and a stable work surface. Before buying anything, measure the largest component you plan to handle. A small mismatch can stop the entire assembly.
Choose tools that support accurate work. A digital caliper, precision screwdrivers, hex keys, wire cutters, a soldering iron, and a continuity tester are practical choices. Keep tools organized. I once underestimated the value of labeled containers, and tiny screws disappeared under my workbench. That mistake cost time.
Safety equipment matters as much as mechanical parts. Wear safety glasses during drilling, cutting, and soldering. Use heat-resistant protection when handling hot tools. Keep power disconnected while adjusting wiring or moving parts by hand. A clean, dry bench reduces accidental shorts and unstable movement. Label every cable before testing it. My first layout was not perfect, and one reversed connector caused a long troubleshooting session. It worked eventually, but better documentation would have prevented it. Check emergency shutoff access, secure loose cables, and test motion at low speed before installing valuable components.
A practical starter checklist should cover machine hardware, assembly tools, and personal safety. The chart shows a recommended minimum quantity for each essential item before beginning a small desktop build.
Start with one ESD mat and wrist strap, use eye protection during drilling or cutting, keep ventilation available when soldering, and install an emergency-stop control before testing moving parts. Keep spare fuses available for safe troubleshooting.
5 DIY Pick and Place Machine Tips for Beginners
Build and Align the Frame for Stable Movement
A stable pick and place machine begins with a square, rigid frame. Use straight aluminum profiles or carefully cut steel sections. Check every corner with a machinist’s square before tightening the fasteners. Measure both diagonals. They should match closely. Even a small difference can make the gantry bind during travel.
Mount the frame on a firm, level surface. A flexible table can imitate a frame problem and waste hours of adjustment. Install the linear rails only after confirming the base is flat. Tighten each screw gradually, moving from the center outward. Slide the carriage by hand after every few screws. It should move smoothly, without tight spots or scraping sounds. I once blamed the motor for rough motion, but the real fault was a slightly twisted rail.
Tips: Leave access to the fasteners. You may need repeated adjustments. Use thin shims beneath low rail points, but avoid stacking many layers. A dial indicator helps reveal small height changes. Check the gantry at both ends, not only near the home position. The frame may appear square while the rails remain uneven. Mark corrected points with a pencil, then recheck them after tightening. Perfect alignment is difficult in a home workshop, so record what changed and question every measurement.
| No. | Beginner Tip | Key Dimension or Check | Recommended Starting Value | Practical Method | Why It Matters | Common Warning Sign |
|---|---|---|---|---|---|---|
| 1 | Use a rigid, square base frame | Frame diagonal difference | Within 1 mm per 500 mm of diagonal | Measure both diagonals after lightly tightening the fasteners. Adjust the corners until the measurements are nearly equal, then tighten in stages. | A square frame keeps the X and Y axes perpendicular and reduces positioning errors across the working area. | The carriage is accurate near one corner but drifts toward the opposite corner. |
| 2 | Support long rails against bending | Rail span and support spacing | Add support approximately every 300–500 mm on long spans | Place the rail on a flat support surface or use intermediate mounts. Check the rail with a straightedge before final tightening. | Deflection increases as span length increases, which can cause uneven motion and changes in tool height. | The carriage becomes tight in the middle of travel or produces a visible height change. |
| 3 | Align parallel rails before installing belts or screws | Rail parallelism | Keep the rail spacing variation below 0.5 mm over the full travel | Install one rail loosely, use the carriage plate as a reference, and tighten the second rail gradually while moving the carriage from end to end. | Parallel rails prevent binding, excessive motor load, and uneven travel caused by the carriage twisting. | The carriage slides freely at one end but requires force at the other. |
| 4 | Set belt tension without overtightening | Belt condition and tension | Firm with no visible sag; avoid tension that makes the motor shaft or rail flex | Move the carriage by hand with the motor disengaged. Increase tension only until backlash and visible belt slack are removed. | Too little tension causes backlash, while too much tension increases bearing load and can distort the frame. | The motor runs hot, the belt produces a sharp tone, or movement feels stiff. |
| 5 | Verify travel accuracy with repeated tests | Repeatability over a measured distance | Test at 100 mm and 300 mm travel distances | Mark a reference point, command the axis to move away and return at least five times, then compare the final position with a ruler, caliper, or dial indicator. | Repeated testing reveals backlash, loose fasteners, skewed rails, and incorrect steps-per-millimeter settings. | The return position changes between tests or the error grows with travel distance. |
5 DIY Pick And Place Machine Tips for Beginners
Configure Motors, Sensors, and Control Software
Choose motors with enough torque for your gantry, gripper, and payload. Oversized motors can waste power and create unnecessary vibration. Start with slow acceleration. On my first build, sharp acceleration loosened a pulley after several cycles. Secure couplers and check belt tension by hand.
Set a conservative current limit before testing movement. Excess current heats motors and drivers quickly. Use homing sensors at every travel axis. Place them where the carriage can reach them without forcing the frame. Add a second sensor for part detection near the pickup point. Test each sensor with a multimeter or live software reading. Small wiring mistakes are common.
Keep the control software simple at the beginning. Use a clear sequence: home, move, lower, grip, lift, transfer, and release. Add short delays when a gripper needs time to respond. Record position errors in a basic log. This helps separate mechanical slip from coding faults. My early program worked in dry runs but failed with heavier parts. I had ignored motor heat and pickup height. Recheck calibration after every mechanical adjustment. Limit travel in software, and include an emergency stop that cuts motion power. Do not trust a single successful cycle. Run repeated tests at low speed, then inspect fasteners, sensor readings, and placement accuracy.
A DIY pick and place machine becomes useful only when its placement accuracy is measurable. Begin with a simple test board and mark ten target points. Use the same component type for every trial. Measure each offset with a caliper or a printed grid. Record X, Y, and rotation errors in a small log. Small errors matter.
Check the nozzle tip, feeder position, and camera alignment before changing software settings. A bent nozzle can create random shifts. Loose rails may cause different results during forward and reverse movement. Run the machine slowly, then repeat the test at normal speed. Compare the average error and the largest error. Repeatability is more important than one lucky placement.
Improve one variable at a time. Clean the nozzle, tighten the frame, or adjust the pickup height. Do not change all three together. That makes troubleshooting unclear. A placement may look correct but still have weak contact. Inspect component edges under bright light. Check whether parts rotate during pickup. My early tests showed acceptable X and Y accuracy, but rotation was poor. I had ignored feeder alignment. That mistake taught me to inspect the whole movement path, not only the final position. Keep failed samples and notes. They provide reliable evidence for the next adjustment.